M1, M2, M3, M4 veya M5 MacBook veya Neo'ya iki veya daha faz
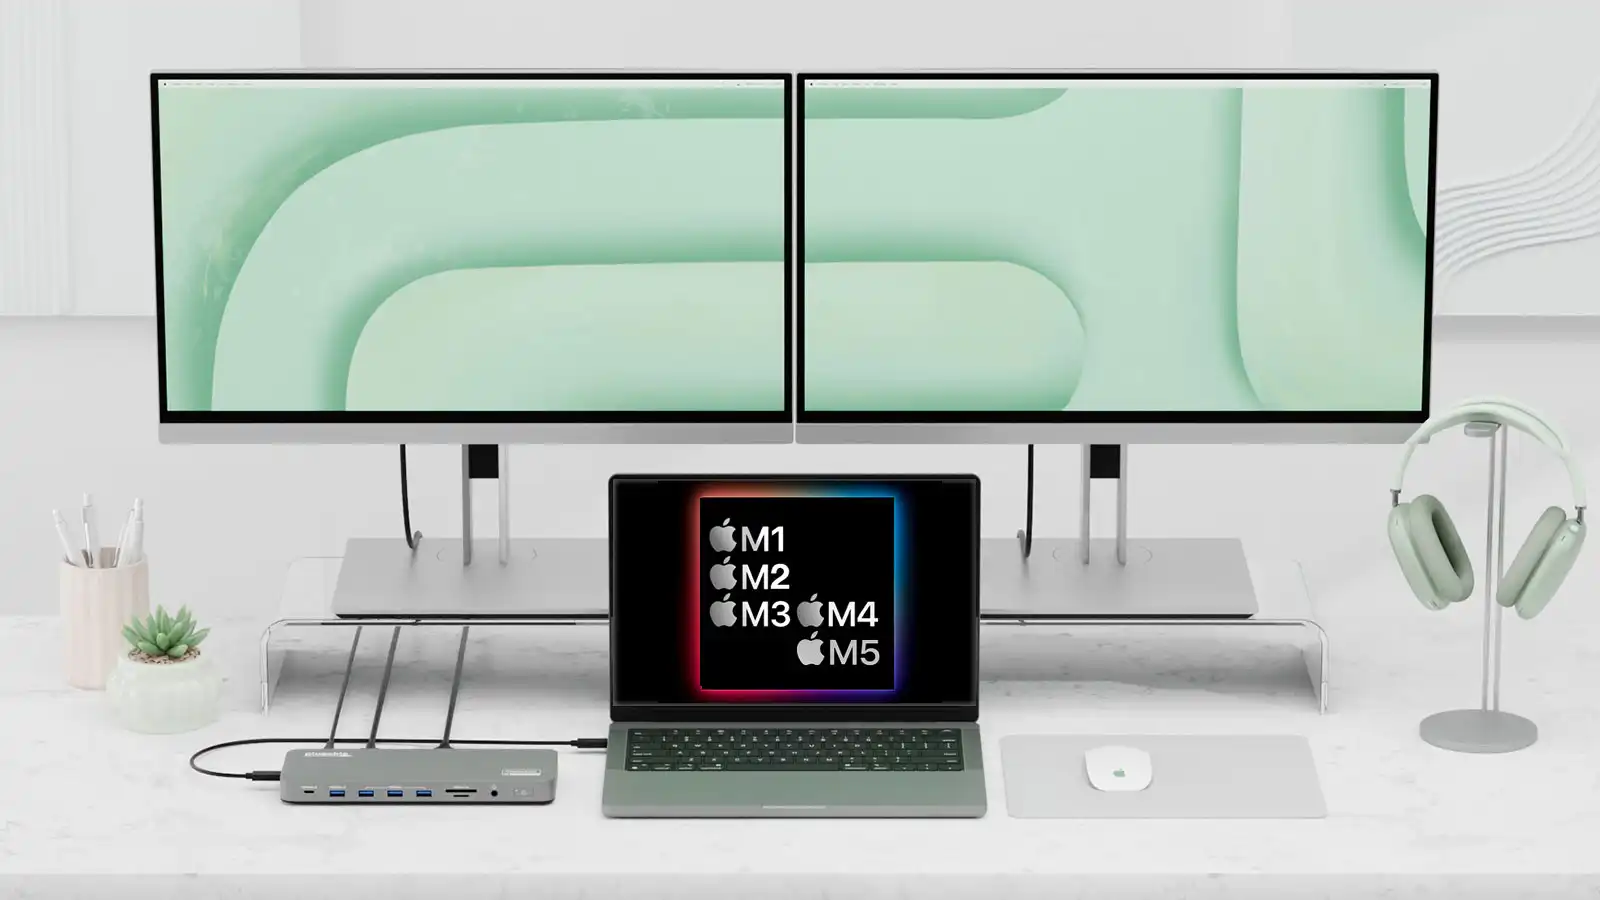
M1, M2, M3, M4 veya M5 MacBook veya Neo'ya iki veya daha fazla harici ekran nasıl bağlanır?

- M1, M2 ve Neo MacBook'ların doğal olarak yalnızca bir harici ekranı desteklediğini, daha yeni M3-M5 modellerinin ise iki ila dört ekranı desteklediğini açıklıyor.
- DisplayLink veya InstantView uyumlu bağlantı istasyonları, bu sınırlamaları aşarak USB grafik teknolojisi aracılığıyla beş adede kadar harici ekranın kullanılmasını sağlayabilir.
- Bu çözümlerin dezavantajları arasında 60 Hz yenileme hızı sınırlaması, olası gecikme ve HDCP kısıtlamaları nedeniyle engellenen yayın içeriği yer almaktadır. Ayrıntılı talimatlar aşağıda verilmiştir.
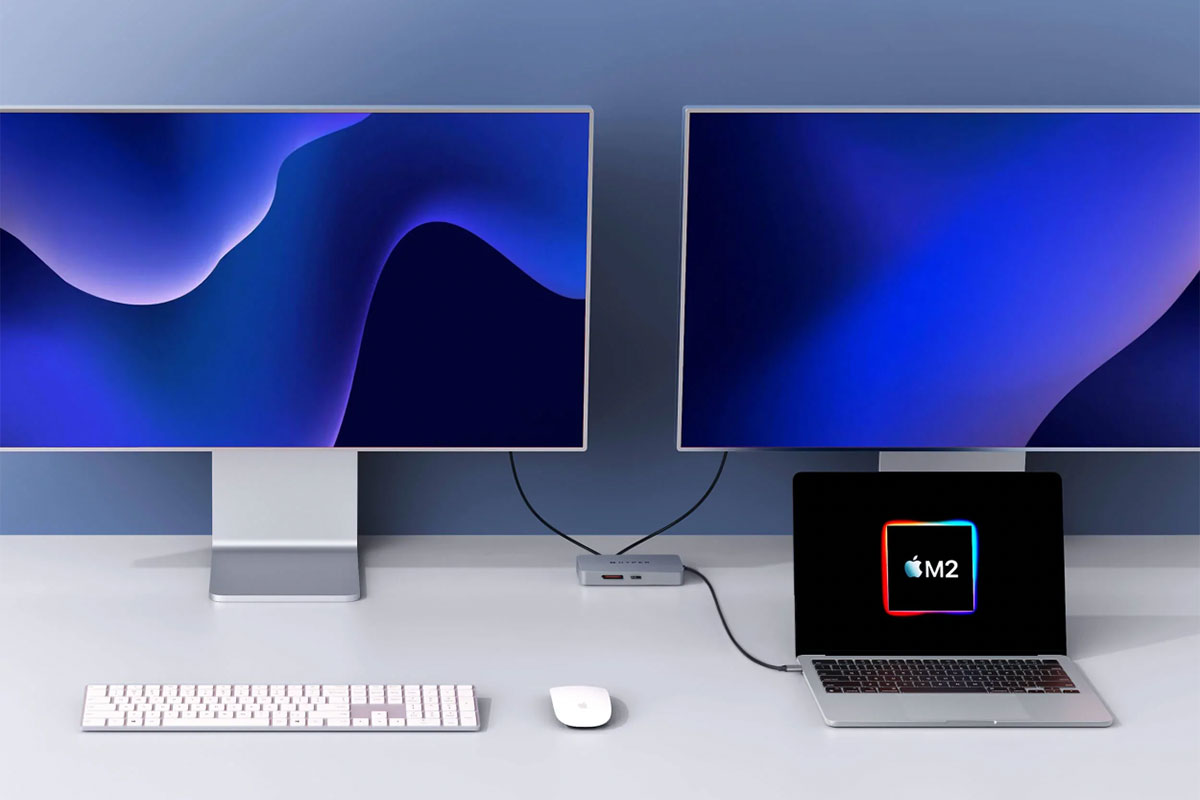
M1/M2/M3/M4/M5 Pro ve Max çipli üst düzey MacBook'lar birden fazla harici ekranı desteklerken, Apple'ın standart M1 ve M2 işlemci kullanan alt düzey MacBook serisi, birden fazla harici monitöre doğrudan bağlanamaz ve bunu yapmak için M3'ün kapağının kapalı olması gerekir. MacBook Neo da yalnızca bir harici monitörle sınırlıdır.
Bu, giriş seviyesi Mac'ler için büyük bir sınırlama: M1 MacBook , M2 MacBook ve MacBook Neo . Apple'ın M3 MacBook Air modelleri iki harici monitörü destekliyor, ancak yalnızca MacBook'un kapağı "Kapak Modu" olarak bilinen şekilde kapalıyken. M3 MacBook Pro, en az macOS Sonoma 14.6 güncellemesi yüklüyse benzer bir özelliği destekliyor . M3 MacBook'ta çift harici ekran çalıştırmanın nasıl yapılacağını ayrı bir makalede açıklıyoruz .
Bu Mac harici monitör ipuçları kimlere yardımcı olacak?
• Mac'inizde standart (Pro veya Max olmayan) M1 veya M2 çipi varsa veya MacBook Neo ise , buradaki ipuçlarımızı ve çözümümüzü uygulamadığınız sürece yalnızca bir harici monitör kullanabilirsiniz.
• Mac'inizde standart (Pro veya Max olmayan) bir M3 çipi varsa, kendi kapağı kapalıyken (yani kendi ekranını göstermezken) yalnızca iki harici monitör kullanabilir; aksi takdirde buradaki ipuçlarımızı ve çözümümüzü uygulamanız gerekir.
• Mac'inizde M4 , M5 , M4 Pro veya M4 Max çipi varsa, yalnızca iki harici monitör kullanabilirsiniz; ek çözümler kullanarak beş monitöre kadar ekleyebilirsiniz.
• Mac'inizde M5 Pro çipi varsa, harici monitör kullanımı üç ile sınırlıdır; ek çözümler kullanarak beş monitöre kadar ekleyebilirsiniz.
• Mac'inizde M5 Max çipi varsa, harici monitör kullanım sayısı dört ile sınırlıdır; ek çözümler kullanarak beş monitöre kadar ekleyebilirsiniz.
Aşağıdaki çözümler, isterseniz kapakları açıkken düz M1, M2 Mac'lerde ve MacBook Neo'da ve ayrıca M3 Mac'lerde ikiden fazla harici ekran kullanmanıza olanak tanır. Düz M4/M5 MacBook Air ve M4/M5 MacBook Pro modelleri, kapakları açıkken iki ekranı doğal olarak destekler, ancak bu MacBook'lar için üç veya daha fazla ekran istiyorsanız okumaya devam edin.
Her durumda, bir yazılım indirme işlemi ve bir bağlantı istasyonu, hub veya adaptör gereklidir
Daha sonra, düz M1, M2 ve M3 Mac'lere ve MacBook Neo'ya birden fazla ekran eklemek için test ettiğimiz ve önerdiğimiz yazılım ve donanım çözümlerini listeliyoruz. DisplayLink hakkında her şeyi biliyorsanız doğrudan en iyi DisplayLink bağlantı istasyonları listemize geçebilirsiniz . Bilmiyorsanız, biraz daha okumaya devam edin.
En basit çözüm, bazen DisplayLink Dock olarak da adlandırılan, USB grafik özellikli bir bağlantı istasyonu veya hub edinmektir ve bu makalenin ilerleyen bölümlerinde en iyilerini inceledik . USB grafik, bilgisayardan monitöre video sinyallerini sıkıştıran yazılım tabanlı bir teknolojidir (DisplayLink veya InstantView), bu da M1/M2/M3 veya Neo MacBook'unuza birden fazla harici ekran bağlamanıza olanak tanır.
Mac'inizi harici bir monitöre nasıl bağlayacağınızın temellerini ele alıyoruz .
Masaüstü Mac'lere de yardımcı olunabilir.
M1, M2 ve Neo MacBook'lar yerel olarak yalnızca bir monitörü desteklerken, masaüstü M1 Mac Mini ve M2 Mac Mini, HDMI bağlantı noktası üzerinden bir ve USB-C üzerinden bir olmak üzere en fazla iki harici monitörü destekler. M4 Mac mini ise üç ekrana kadar destekler: Thunderbolt üzerinden 60Hz'de 6K çözünürlüğe kadar iki ekran ve Thunderbolt üzerinden 60Hz'de 5K çözünürlüğe veya HDMI üzerinden 60Hz'de 4K çözünürlüğe kadar bir ekran.
Geçici çözüm: DisplayLink yazılım sürücülerini yükleyin.
M1/M2/M3/Neo MacBook'ların tek monitör sınırlamasını aşmak için çeşitli ekran teknolojilerini bir arada kullanabilirsiniz. DisplayLink, uyumlu bir dock ile birlikte kullanılan en yaygın yazılım çözümüdür ve SiliconMotion'ın InstantView'ı da bir diğeridir. Dock'ların DisplayLink veya InstantView uyumluluğunu belirtmesi gerektiğini unutmayın; DisplayLink sürücülerini yükleyip normal dock'lar ve hub'larla çalışmasını umamazsınız. Burada, kısaca hepsine DisplayLink dock'ları diyeceğiz.
DisplayLink, adaptörlerin veya bağlantı istasyonlarının normalde yalnızca veri bağlantılarını destekleyen USB bağlantı noktaları üzerinden video çıkışı vermesini sağlayarak, bir Mac'in doğal olarak destekleyebileceği ekran sayısındaki sınırlamaları (örneğin, temel M1, M2, M3 ve Neo Mac'lerdeki tek ekran sınırlaması) aşar. Birçok çoklu ekran bağlantı istasyonu, yerel USB-C Alternatif Modu (yerel "Alt Mod" video çıkışı) ve DisplayLink teknolojisinin bir kombinasyonunu kullanır. Bu kombinasyon, M1/M2/M3/Neo platformunun USB-C üzerinden yalnızca tek bir harici ekranı desteklemesi sorununa bir çözüm sunar.
DisplayLink'in Mac'e üçüncü taraf bir sürücünün yüklenmesini gerektirdiğini unutmayın. Genel olarak, kurulum basittir. Aşağıda incelediğimiz bazı bağlantı istasyonları, bağlantı istasyonunu Mac'inize ilk bağladığınızda DisplayLink yazılımını sunar. DisplayLink macOS uygulaması veya DisplayLink Yöneticisi uygulaması, macOS'ta DisplayLink teknolojisini etkinleştirmenin yollarıdır. Uygulama, Mac App Store üzerinden değil, bağımsız bir yükleyici olarak mevcuttur . macOS 26 Tahoe ve önceki sürümler için indirilebilir sürümleri bulunmaktadır.
Hyper ve Satechi hub'larıyla InstantView'ın ilk kurulumu DisplayLink'e göre daha kolaydır, ancak Apple'ın yazılım güncellemelerinin devre dışı bırakabileceği aynı zorluğa sahiptir; bu da DisplayLink'te olduğu gibi daha yeni bir sürüm yüklemeyi ve ekran kaydı için gerekli güvenlik ve gizlilik ayarlarını yapmayı gerektirir. InstantView yazılımının en son sürümünü buradan indirebilirsiniz . En son sürüm macOS 26 Tahoe, 15 Sequoia, 14 Sonoma, 13 Ventura ve 12 Monterey'i desteklemektedir.
Her iki yazılım çözümü de karmaşık değil ve aşağıda okuyabileceğiniz gibi testlerimizde ikisi de iyi sonuç verdi. DisplayLink ve InstantView kullanmanın bazı dezavantajları var , bunları dock grafiğinin altındaki SSS bölümünde ayrıntılı olarak açıklıyoruz, ancak bunların hiçbiri çoğu kullanıcıyı rahatsız etmemeli.
1. Öncelikle, en son Mac DisplayLink sürücüsünü indirin . Yukarıda belirtildiği gibi, bazı bağlantı istasyonları bunu sizin için otomatik olarak yapar, ancak her zaman en son sürümü kullanmak en iyisidir.
DisplayLink Manager Grafik Bağlantı Uygulaması v. 15.1, macOS Sonoma 14, Sequoia 15 ve Tahoe 26 ile uyumludur. macOS Ventura 13 için 15. sürüm, Monterey 12 için 1.11. sürüm, Big Sur 11 için 1.9. sürüm ve Catalina 10.15 için 1.5. sürüm gereklidir. Uygulama, Apple Menü çubuğundaki DisplayLink simgesi üzerinden yönetilebilir.
İşte işin püf noktası: DisplayLink Manager uygulamasının pikselleri yakalayabilmesi ve bunları USB çevre birimine gönderebilmesi için "Ekran Kaydı"nı etkinleştirmeniz gerekiyor.
Bu ayar, Sistem Tercihleri'nde Güvenlik ve Gizlilik bölümündeki Gizlilik kısmında bulunur ; soldaki listeden Ekran Kaydı'na gidin ve yönetici parolanızı kullanarak kilidi açtıktan sonra DisplayLink Manager için Ekran Kaydı iznini işaretleyin. Sonrasında DisplayLink Manager'ı kapatıp yeniden başlatmanız gerekebilir. Merak etmeyin, DisplayLink ekranınızı kaydetmiyor; bu sadece birden fazla ekranı etkinleştirme özelliğini kullanmasına olanak tanıyor.
Kurulum oldukça basittir; buradaki talimatlara göz atabilirsiniz . Eski sürümler dizüstü bilgisayarların kapalı ekran/kapaklı modunu desteklemiyordu, ancak 1.8.1 ve sonraki sürümler, MacBook'unuz macOS 11 veya daha yeni bir sürüm çalıştırıyorsa kapaklı modu desteklemektedir.
DisplayLink yöneticisinde "başlangıçta çalıştır" seçeneği bulunur veya DisplayLink Yöneticisini Kullanıcılar ve Gruplar'daki Giriş Öğelerinize sürükleyebilirsiniz.
2. Ardından MacBook'u bir DisplayLink bağlantı istasyonuna bağlayın; bağlantı istasyonunun DisplayLink'i desteklemesi gerekir, aşağıda listelenen incelenen ürünlerin tümü bu özelliği desteklemektedir.
For the first screen you can connect via the dock’s DisplayPort, HDMI or USB-C/Thunderbolt port, and this will be handled natively by the M1/M2 MacBook. If you need to, you can use a USB-C to HDMI or DisplayPort adapter.
The HDMI or DisplayPort output uses Alternate Mode (Alt Mode), and as it is basically a pipeline directly to the system’s native GPU, it will behave just like if you hooked up a USB-C to HDMI dongle to your laptop. This requires no user driver installation.
The second and third displays will rely on the DisplayLink software. DisplayLink uses an installed driver and the system CPU and GPU to convert graphics data on the system into data packets. That data is then sent over the cable as data packets and converted back to video information and output to the monitors via the DisplayLink chip in the docking station.
Which dock is best?
A docking station connects to your MacBook via Thunderbolt or USB-C. It then offers multiple ports that your laptop now has access to. These can include new display ports, such as HDMI, as well as Ethernet for wired Internet access, USB-C/Thunderbolt/USB-A ports at varying speeds, audio plugs, and card readers. A simpler hub or adapter has fewer ports but may have all the video or USB ports required.
The main thing to remember here is that the dock, hub or adapter needs to support either DisplayLink or InstantView for the extra multi-screen magic to work. Non-DisplayLink docking stations are great if your MacBook can handle the number of screens you desire but you need more ports and functionality.
Docking station and hub manufacturers are now actively marketing their products as solutions to the M1/M2/M3/Neo external display limitation—docks have to support DisplayLink to work with the software. All the docks and hubs reviewed below require either the DisplayLink download or another similar software solution, such as InstantView, but no further hardware adapter except for the dock or hub itself. And of course, these hubs offer the usual multi-port benefits as well as the external monitor solution.
The best multiscreen hubs and adapters for Neo, M1, M2, M3, M4 and M5 MacBooks
Below we have gathered the best dedicated hubs and docks for multiscreen M1/M2/M3/M4/M5/Neo. Note that most of these listed (and tested) below use USB-C rather than Thunderbolt, so don’t benefit from the MacBook’s potential pro-level 40-80Gbps data bandwidth but are usually cheaper. If you require bandwidth higher than 10Gbps, go for a DisplayLink-supporting Thunderbolt dock. The MacBook Neo has USB-C rather than Thunderbolt so is limited to 10Gbps anyway but can use the Thunderbolt docks, too if you like as USB-C and Thunderbolt are compatible..
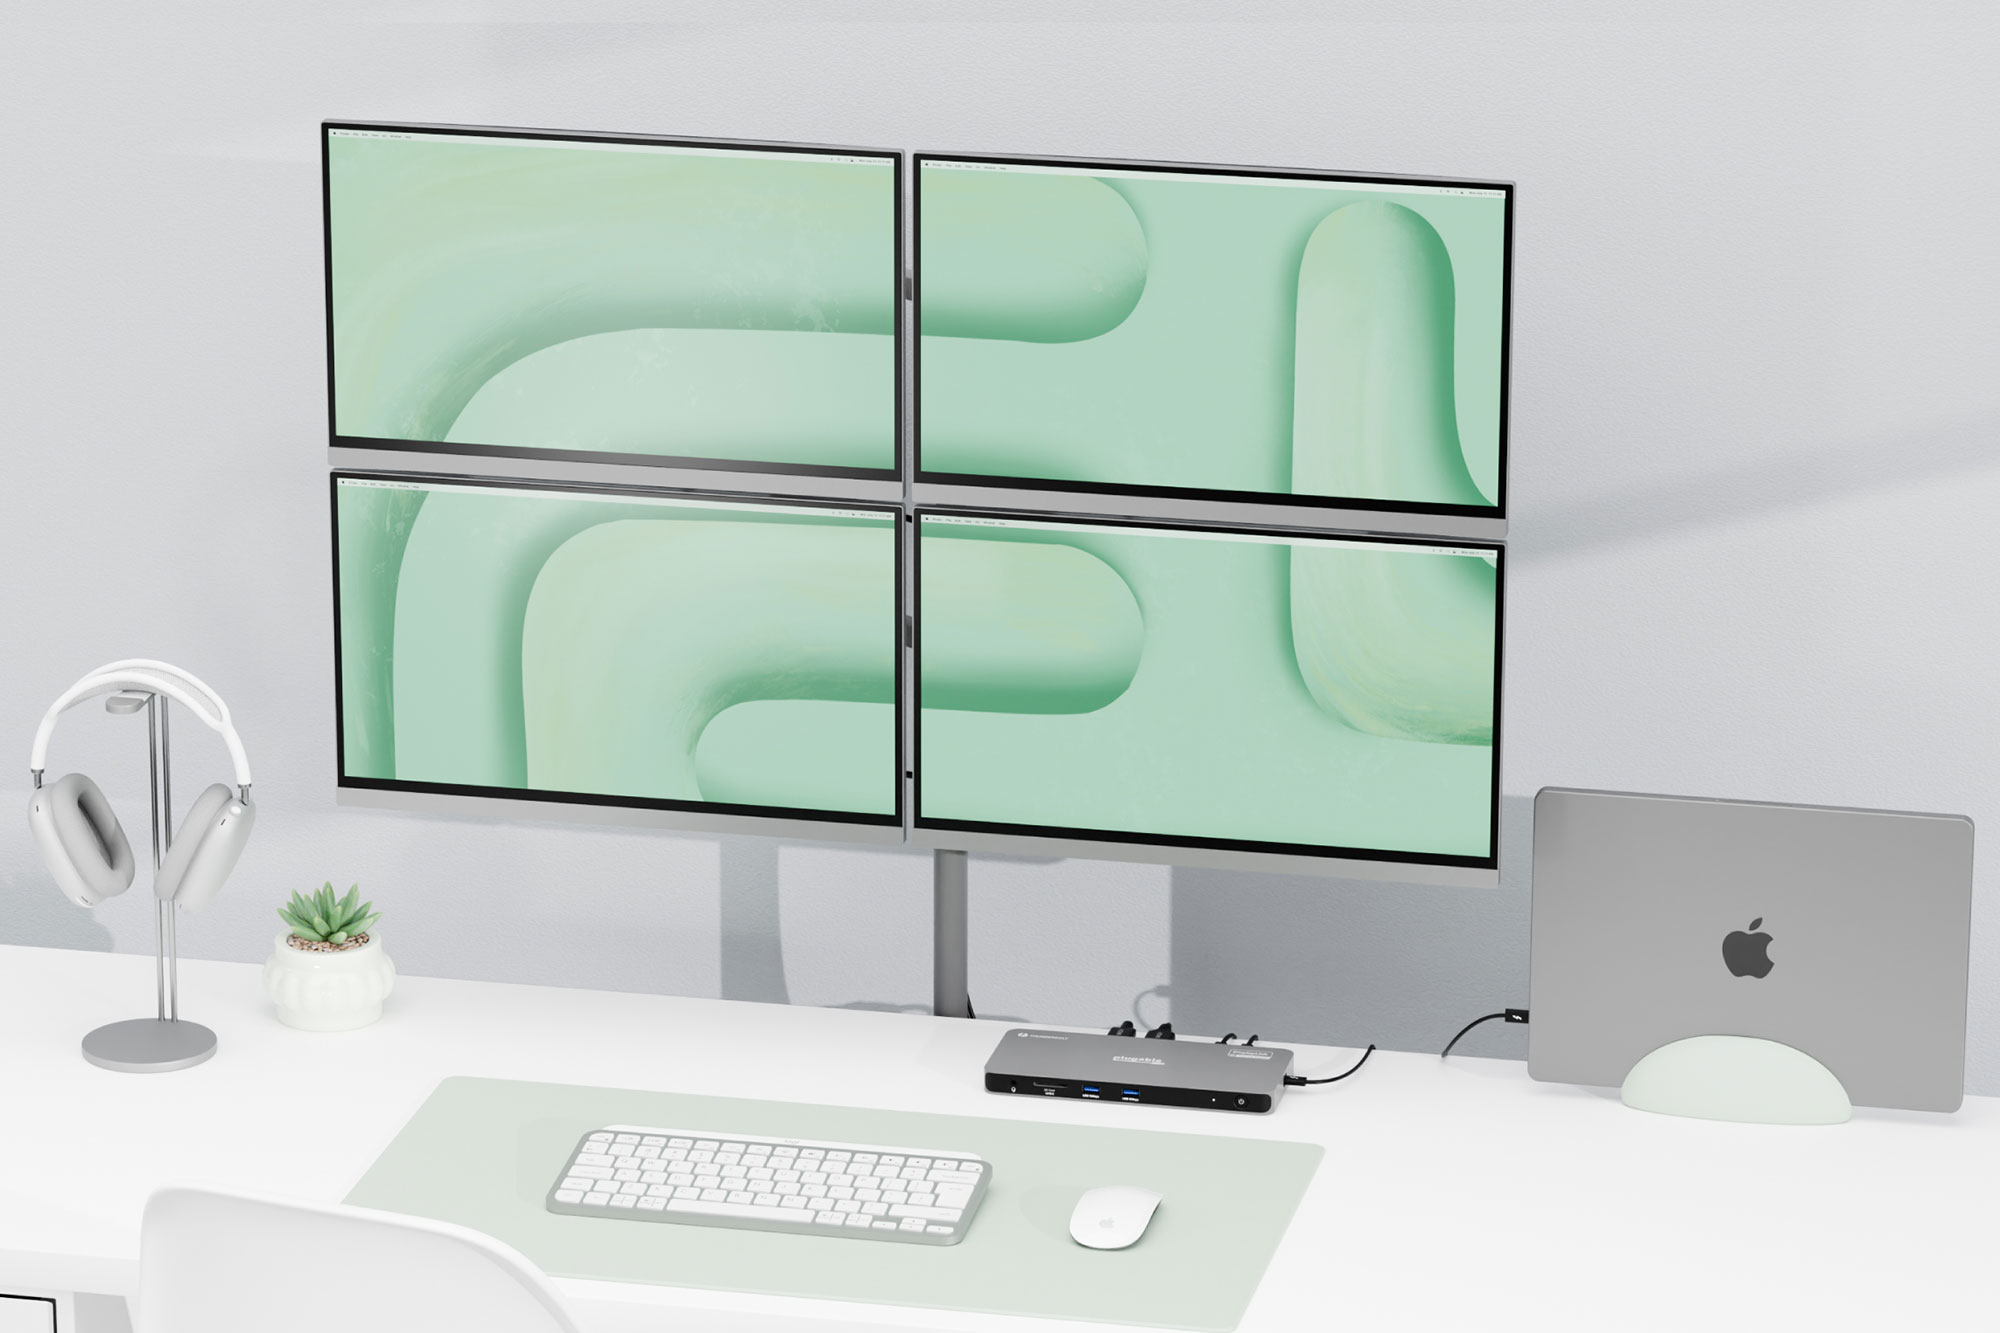
We have tested DisplayLink docks that can support up to five external displays and some that max out at two, which we expect will be plenty enough screen space for most people. You can use a five-screen DisplayLink dock even if you need only two monitors, and use the spare ports for other purposes.
Plugable 5 Display USB-C Dock (UD-7400PD) – five 4K displays at 60Hz
Pros
- Supports up to five external displays at 4K 60Hz
- 3x 8K at 60Hz displays
- 11 ports
- 2x HDMI video ports
- 140W PD laptop charging
- 2.5Gb Ethernet
Cons
- No SD card reader
- North America only
- Connection: USB-C (10Gbps)
- Software: DisplayLink
- Max screens: 5
Let’s begin with the DisplayLink dock that supports the most external displays: the Plugable UD-7400PD allows even M1 MacBook and Neo users to run up to five 4K displays at a 60Hz refresh rate. This is made possible by use of the latest Synaptics’ DisplayLink DL-7400 chipset. No other dock can match it. Although five displays is probably overkill for most users, financial and data analysts can’t have enough screens and will love it. You don’t have to add five displays, of course, but this dock is the one that will let you do so. It even offers something to the mighty M5 Max MacBook that can natively support four external displays; with the Plugable UD-7400PD it can move to five.
There are two HDMI ports (one HDMI 2.1 for 8K and one 2.0) plus three downstream USB-C ports to connect either those displays or other devices. There are two fast 10Gbps USB-A ports, speedy 2.5Gb Ethernet and an audio jack, but no SD card reader. At the front of the dock, one of the USB-C ports can output power to a connected device at 30W, which is perfect if you want to fast-charge an iPhone or even an iPad.
If you need faster bandwidth, the Satechi Thunderbolt 4 Docking Station with DisplayLink (reviewed below) boasts 40Gbps data transfer and supports four displays for the M3 MacBook Air (while shut in Clamshell Mode), but with it the M1 and M2 MacBooks are limited to three (one at 6K and two at 4K).
IT managers will appreciate Plugable’s DockTag technology that works with the UD-7400PD, a web-based solution designed for hot-desking and real-time IT asset management in mixed-platform offices.
Read our full Plugable 5 Display USB-C Dock (UD-7400PD) review
Satechi Thunderbolt 4 Docking Station with DisplayLink – three 4K displays at 60Hz for M1/M2/Neo, four for M3/M4/M5
Pros
- Supports up to four external displays at 4K 60Hz
- One display at 6K 60Hz
- 11 ports, inc. three 40Gbps Thunderbolt 4
- 2x HDMI 2.0 video ports
- Speedy SD card reader
- 96W laptop charging and 180W power supply
Cons
- Only three displays for M1/M2/Neo
- U.K. users need local power cable
- Connection: Thunderbolt 4 (40Gbps)
- Software: DisplayLink
- Max screens: 4
While plain M1/M2/Neo MacBooks are limited to three external displays using this dock when DisplayLink software is installed, M3/M4/M5 and M1/M2/M3/M4 Pro/Max MacBooks can connect to four 4K at 60Hz.
Other docks reviewed here also allow M1 and M2 Macs to connect to three displays, but what we really like about the Satechi Thunderbolt 4 Docking Station with DisplayLink is right there in its name: it’s a full Thunderbolt 4 dock rather than USB-C. It therefore offers 40Gbps data-transfer rates compared to the 10Gbps that you’ll find on most of the other docks reviewed here. The Plugable TBT-6950PD, reviewed below, is very similar to this Satechi dock. Note that the Neo uses 10Gbps USB-C rather than Thunderbolt, so is limited to that speed, although it will still work with Thunderbolt docks.
That Thunderbolt port connection also allows one of the three screens to be at 6K resolution (60Hz) while the other two via HDMI will be 4K at 60Hz.
There are two HDMI 2.0 ports plus a generous three downstream Thunderbolt 4 ports (as well as one upstream TB4 to the laptop). It doesn’t host any extra USB-C ports but the three Thunderbolt 4 ports (40Gbps data transfer, 15W power output) are backwards compatible with USB-C. There are two fast 10Gbps USB-A ports, too, plus a UHS-II SD card reader, Gigabit Ethernet and an audio jack.
Non-Pro/Max M3, M4 and M5 Macs can connect to four displays using this dock, as long as the laptop’s lid is closed (clamshell mode). It’s also a great option for M1/M2/M3/M4 Pro users usually restricted to two external displays, or M5 Pro users who are restricted to three.
U.K. customers can buy direct from Satechi (with a small shipping fee) but will need to purchase a local power cable.
Satechi also sells a 12-port USB-C-based Triple 4K Display Docking Station that supports three 4K displays at 60Hz using DisplayLink. It is priced the same as the Satechi Thunderbolt DisplayLink Dock. Normally we’d always pick a Thunderbolt dock over USB-C but this one hosts a mix of DisplayPort and HDMI ports that offers a more flexible monitor choice than the Thunderbolt dock’s two HDMI and three TB4 ports. If you prefer DisplayPort for your monitor connection you should consider this USB-C dock although a simple USB-C to DisplayPort adapter will work the same magic on the TB dock.
Read our full Satechi Thunderbolt 4 Docking Station with DisplayLink review
Plugable Thunderbolt 4 Docking Station (TBT-6950PD) – three 4K displays at 60Hz for M1/M2, four for M3/M4/M5
Pros
- Supports up to four external displays at 4K 60Hz
- One display at 6K 60Hz
- 11 ports, inc. three 40Gbps Thunderbolt 4
- 2x HDMI 2.0 video ports
- Speedy SD card reader
- 96W laptop charging and 180W power supply
Cons
- Only three displays for M1/M2/Neo
- North America only
- Connection: Thunderbolt 4 (40Gbps)
- Software: DisplayLink
- Max screens: 4
This dock is almost identical to the Satechi Thunderbolt 4 DisplayLink dock reviewed above. M1/M2/Neo Mac owners can connect up to three external displays, and M3 and M1/M2/M3/M4/M5 Pro and M1/M2/M3/M4 Max users can attach up to four monitors. The M5 Max doesn’t need help to support four external monitors.
The Thunderbolt port means one of the three screens can be at 6K resolution (60Hz) while the other two via HDMI will be 4K at 60Hz.
The USB ports are at least 10Gbps and the SD card reader is also fast at 312MBps.
The Plugable version has a few advantages over the Satechi: a slightly longer (1m vs 0.8m) Thunderbolt cable, Kensington lock slot and two-year warranty (vs 1 year from Satechi).
Read our full Plugable Thunderbolt 4 Docking Station for 4K Quad Monitors review
WAVLINK USB-C DisplayLink (DL7400) Docking Station – four 4K displays at 60Hz for M1/M2/M3/M4/M5
Pros
- Supports up to four external displays at 4K 60Hz
- 2x 8K at 60Hz display
- 2.5Gb Ethernet
- 30W USB-C
- 14 ports
- 2x HDMI 2.0 video ports
- Speedy SD card readers
- 100W laptop charging and 160W power supply
Cons
- Pricey for USB-C
- Connection: USB-C (10Gbps)
- Software: DisplayLink
- Max screens: 4
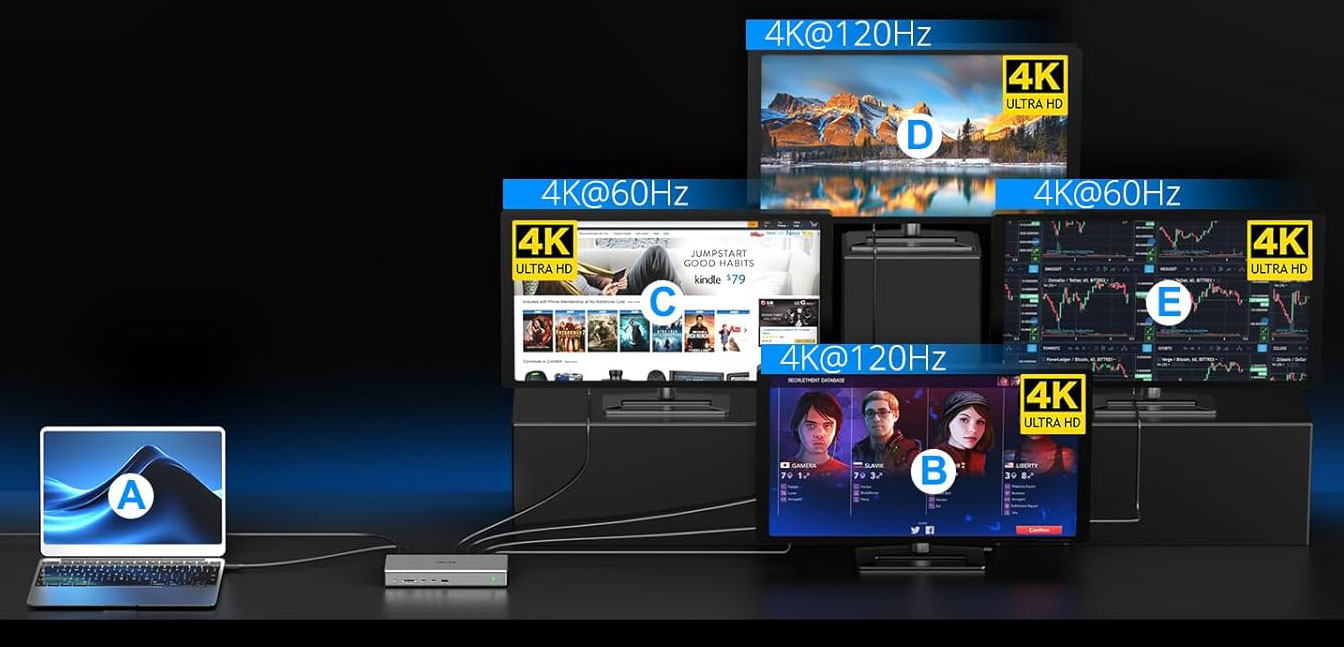
While the Satechi and Plugable Thunderbolt DisplayLink docks support four displays for the M3 MacBook Air (while shut in Clamshell Mode), the M1 and M2 MacBooks are limited to three (one at 6K and two at 4K) using those docks. The Wavlink’s newer DL7400 chipset allows for even the M1 and M2 Macs to connect to four displays at impressive refresh rates: 1x 4K at 120Hz and 3x 4K at 60Hz.
As such, if you desire four displays to be hooked up to your M1 or M2 MacBook, the Wavlink dock is the better choice. Plugable’s use of the same chipset on its UD-7400PD dock, reviewed above, supports up to five displays.
It might lack the Satechi and Plugable docks’ faster Thunderbolt connection but it beats them on network speeds with a 2.5Gb Ethernet port—2.5 times faster if your network matches this (it’s backwards compatible with 1GbE).
The USB ports are at least 10Gbps and the SD and microSD card readers are also speedily rated at 312MBps.
Read our full WAVLINK USB-C DisplayLink (DL7400) Docking Station review
Wavlink Dual 4K DisplayPort & HDMI Adapter – two 5K displays at 60Hz
Pros
- Supports two external displays at 5K 60Hz
- 2x DisplayPort 1.4 video ports
- 2x HDMI 2.0 video ports
Cons
- No USB ports, Ethernet etc
- No passthrough laptop charging
- Connection: USB-C (5Gbps)
- Software: DisplayLink
- Max screens: 2
Also from Wavlink this simple, portable and affordable adapter doesn’t give you loads of extra USB ports, Ethernet or card readers like a hub or docking station would, but it offers four powerful video ports: two DisplayPort 1.4 and two HDMI 2.0.
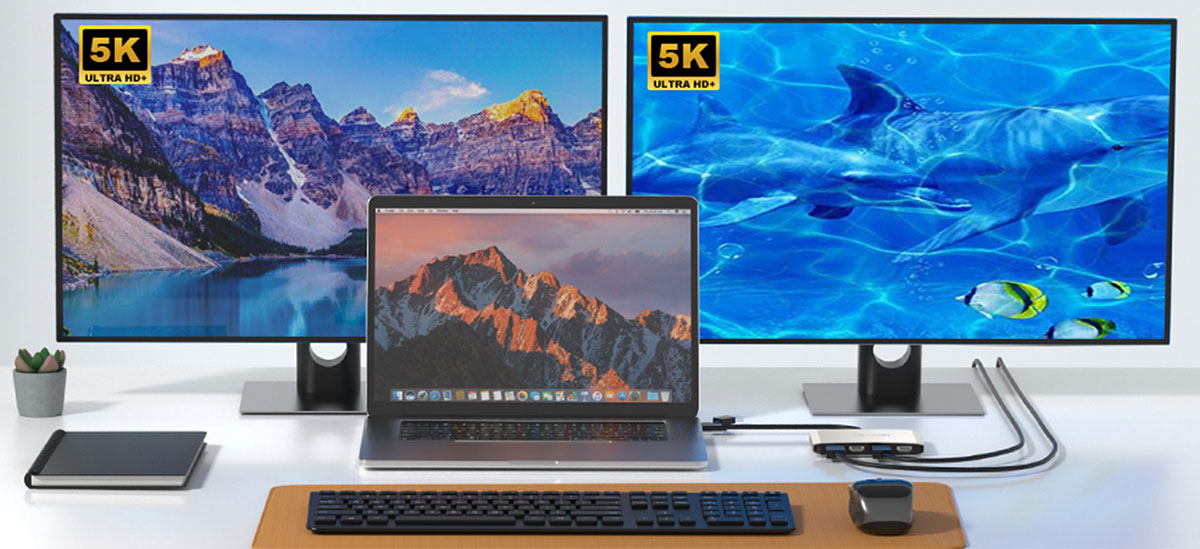
Once you’ve installed the DisplayLink drivers, this means an M1/M2/M3 MacBook can run two extended displays at up to 5K (5120-x-1440) at 60Hz using a combination of these video ports. You’d need to use both DisplayPort 1.4 ports for the maximum 5K resolution—the HDMI 2.0 ports max out at 4096-x-2160 at 60Hz.
There’s no passthrough charging so you’ll need to use another of the MacBook’s Thunderbolt ports to keep the laptop powered up in use.
Plugable USB-C Dual HDMI Adapter – two 4K displays at 60Hz
Pros
- Dual 4K monitor support for M1/M2/M3 Macs
- Quad 4K model available
Cons
- No USB ports, Ethernet etc
- No passthrough laptop charging (dual model)
- Connection: USB-C (5Gbps)
- Software: DisplayLink
- Max screens: 2
Another simple one-function affordable adapter, the Plugable USB-C Dual HDMI Adapter (USBC-6950M), pictured below left, uses DisplayLink to enable dual 4K 60Hz displays for M1, M2 and Neo MacBooks with two HDMI ports. Like the Wavlink Dual 4K DisplayPort & HDMI Adapter it’s no dock but it does the multi-screen M1/M2/Neo job you require without fuss.
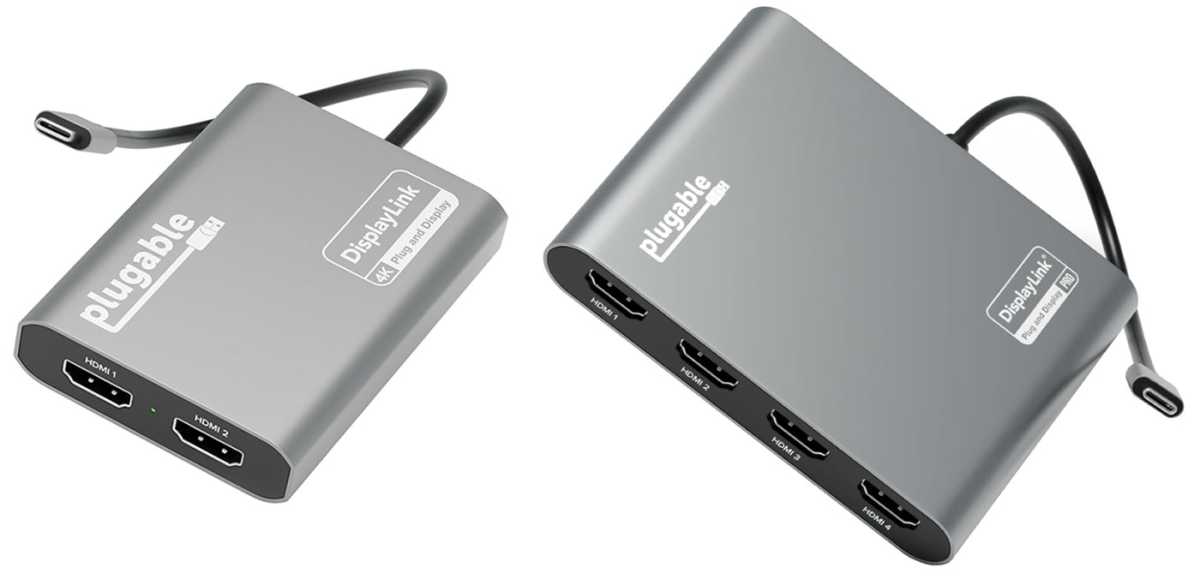
Plugable
There’s a slightly pricier (but still cheaper than a dock) version, the Plugable Dual 4K DisplayPort & HDMI Adapter (USBC-7400H4) pictured above right, that supports four external 4K displays at 60Hz and features 90W passthrough charging to the laptop.
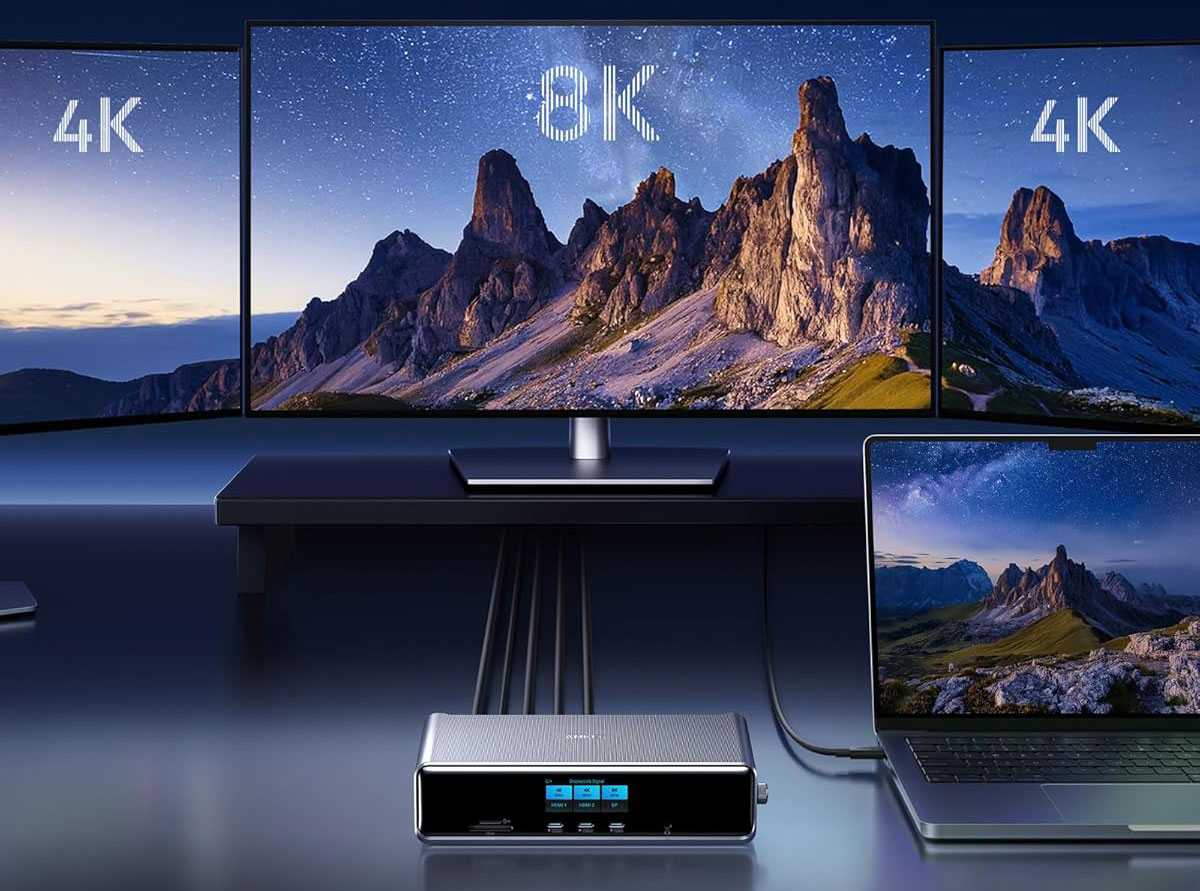
Anker Prime Triple Display 14-in-1 Docking Station – two 4K displays at 60Hz plus one 8K/60Hz
Pros
- Supports three displays: two 4K 60Hz and one 8K 60Hz
- 14 ports, inc. 10Gbps USB-C & 2.5GbE
- Informative front display
- 2x HDMI, 1x DisplayPort
- 3x 100W USB-C ports
- 140W PD laptop charging
Cons
- 160W power supply less than ideal
- Pricey for USB-C
- Connection: USB-C (10Gbps)
- Software: DisplayLink
- Max screens: 3
Anker calls on DisplayLink for this good-looking docking station to support up to three external 4K displays at an impressive 60Hz refresh rate—indeed the two HDMI ports support 4K at 60Hz, and the DisplayPort capable of 8K at 60Hz.
It includes a bunch of impressive non-display ports. It can fast-charge even the top-end 16-inch MacBook at a full 140W PD 3.1, and boasts three 100W USB-C ports at the front alongside an impressively informative smart display.
However, it’s let down somewhat by its weak overall maximum 160W power—enough for many docks but disappointing on a dock with 440W of possible power from its USB-C ports. A power supply of at least 240W would have been more useful.
This dock’s SD and MicroSD are also not the fastest at 104MBps rather than 312Mbps, as seen on some other docks. Its 2.5Gb Ethernet will be welcomed by users on a fast network, and provides future proofing for the rest of us.
Read our full Anker Prime Docking Station (14-in-1, Triple Display, DisplayLink) review
Alogic DX3 Triple 4K Display Universal Docking Station – three 4K displays at 60Hz
Pros
- Supports three external displays at 4K 60Hz
- 12 ports, inc. 10Gbps USB-C
- 3x DisplayPort 1.4 video ports
- Speedy SD and MicroSD card readers
- 100W laptop charging and 135W power supply
- Connection: USB-C (10Gbps)
- Software: DisplayLink
- Max screens: 3
This Alogic DisplayLink docking station supports up to three external 4K displays at an impressive 60Hz refresh rate and has an array of useful non-display ports. It can power the connected laptop at 100W and has a decent 135W external power supply so doesn’t require an extra USB-C charger.
The DisplayLink download link is clearly shown in the user manual, and instructions make sense—although you need a magnifying glass to read them!
The DX3 has three DisplayPort 1.4 ports but no HDMI, so you’ll need to add an adapter between dock and display if you prefer HDMI. As you’ll need to buy video cables anyway, this doesn’t matter as prices for straight cable and adapter cable are close enough.
This dock has two card readers: SD and MicroSD, both at top 312MBps UHS-II—allowing you to add inexpensive portable storage to your laptop setup.
It also has Gigabit Ethernet, four USB-A (one with 7.5W charging) and two 10Gbps USB-C (one 100W PD upstream to the laptop, and one 7.5W smaller device charging).
Reviewed below is Alogic’s DX2, which supports two 4K displays at 60Hz and lacks some of the other ports found on the DX3. if you just need two external monitors for your M1/M2/M3/Neo MacBook this may be a cheaper option.
Alogic DX2 Dual 4K Display Universal Docking Station – two 4K displays at 60Hz
Pros
- Supports two external displays at 4K 60Hz
- 10 ports
- 2x DisplayPort 1.4 video ports
- 65W laptop charging and 100W power supply
Cons
- No card reader
- Connection: USB-C (10Gbps)
- Software: DisplayLink
- Max screens: 2
While we prefer Alogic’s DX3, reviewed above, that supports up to three 4K displays and offers more ports and faster charging for not much more cost, the DX2 is fine if all you require is two top-end monitors connected to your mid-sized M1/M2/Neo MacBook.
It features two DisplayPort 1.4 ports, one 10Gbps USB-C with 7.5W charging, three 5Gbps USB-A ports (one with 7.5W), a 3.5mm audio jack and Gigabit Ethernet.
Plugable USB-C Dual 4K Display Docking Station (UD-6950PDH) – two 4K displays at 60Hz

Pros
- Dual 4K monitor support for M1/M2/M3/Neo Macs
- 13 ports
- 100W PD to laptop
- Fast SD card reader
Cons
- Not for fast data transfer
- North America only
- Connection: USB-C (5Gbps)
- Software: DisplayLink
- Max screens: 2
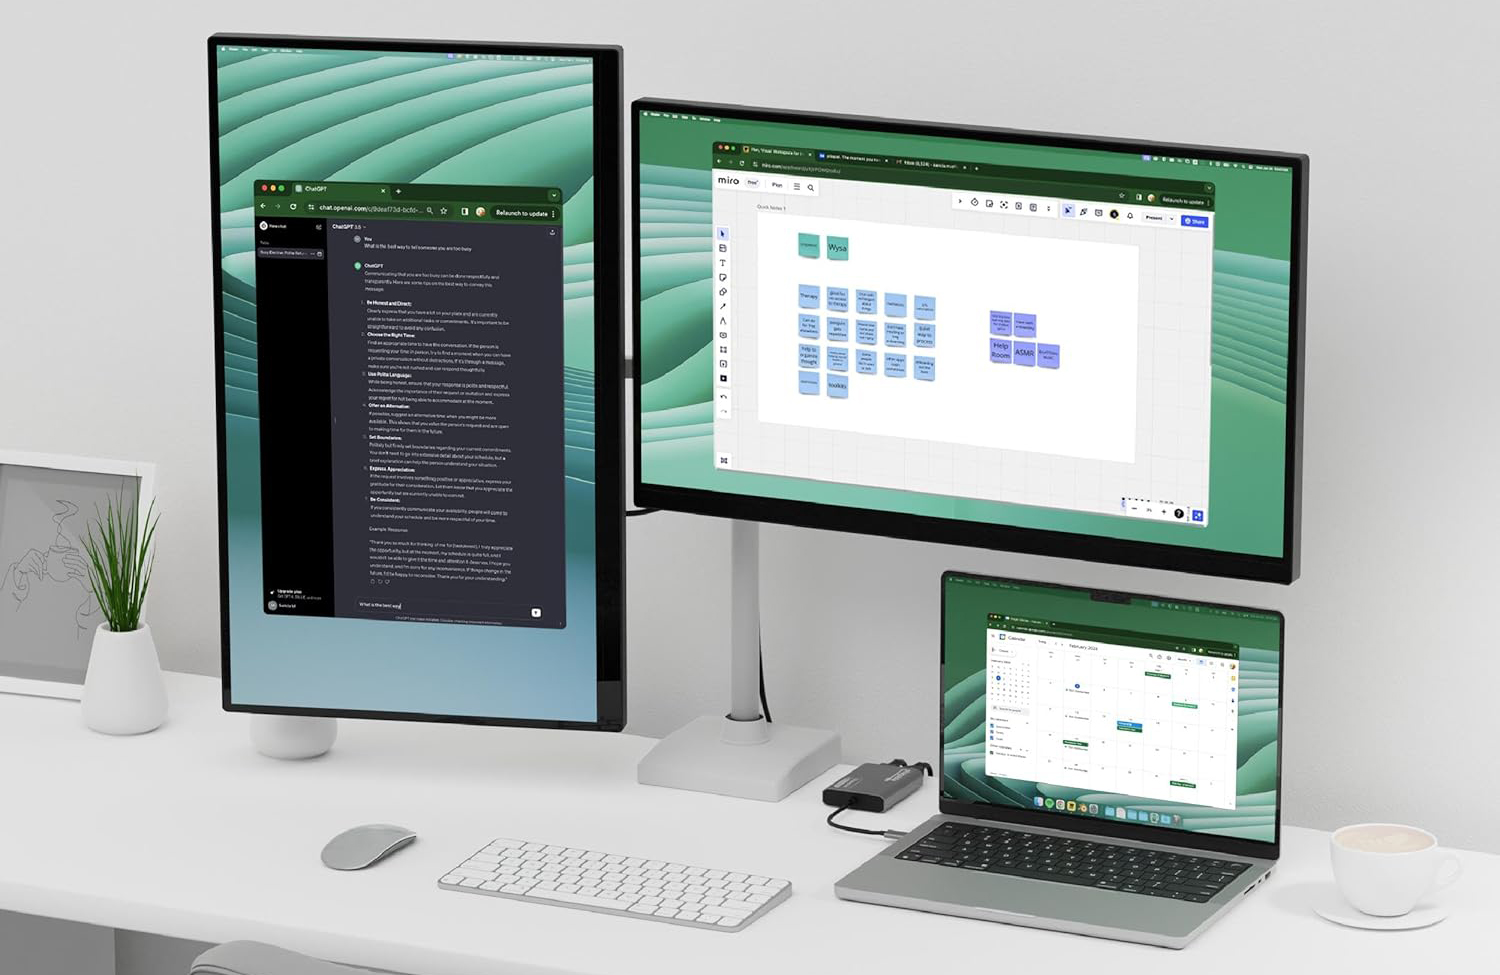
If you don’t require full 40Gbps Thunderbolt, Plugable’s redesigned USB-C–based UD-6950PDH docking station plus free-to-download DisplayLink software can connect two extra 4K/60Hz displays to M1, M2, M3 and Neo Macs. While plain M3 MacBooks can already connect to two external displays, this DisplayLink dock allows plain M3 MacBooks to remain open with the two additional displays attached (otherwise the M3 laptop’s lid has to be closed). M4, M5 and M4 Pro MacBooks can already run two screens natively but using a dock saves the laptop’s built-in ports.
It features an impressive 13 ports including Gigabit Ethernet, SD and MicroSD card readers and five spare USB ports.
You won’t get data transfer any faster than 5Gbps so if you crave the full 40Gbps Thunderbolt bandwidth you should instead consider the more powerful Plugable Thunderbolt 4 Docking Station with DisplayLink, reviewed above.
You can use both of the dock’s HDMI ports or both DisplayPort or a mix of each, depending on your monitor requirements. Two video ports will always be left empty, but the flexibility is welcome.
No availability outside of North America has yet been announced.
Read our full Plugable USB-C Dual 4K Display Docking Station (UD-6950PDH) review
Hyperdrive Dual 4K HDMI 10-in-1 USB-C Hub – one 4K display at 60Hz, one 4K display at 30Hz
Pros
- Supports two external displays at 4K
- 10 ports, inc. 5Gbps USB-C and USB-A
- 100W passthrough laptop charging
- InstantView easier than DisplayLink
Cons
- Second 4K display is 30Hz rather than 60Hz
- Requires USB-C charger
- Connection: USB-C (5Gbps)
- Software: InstantView
- Max screens: 2
The Hyperdrive Dual 4K HDMI 10-in-1 USB-C Hub doesn’t use DisplayLink and instead uses SiliconMotion’s InstantView.
Hyper says that it works “without having to download cumbersome drivers” but there is some software installation involved, and you need to allow InstantView access to your Privacy settings in System Preferences. You connect the hub or adapter to your M1/M2/Neo MacBook and find the HyperDisplay app that appears in a Finder folder sidebar. Double-click the macOS InstantView icon and follow the System Preferences instructions. Once this has been completed your MacBook will automatically recognize the adapter from then on.
It’s an easier solution than DisplayLink but with the same ability to allow M1, M2, M3 and Neo Macs to connect to multiple external displays.
This compact hub still includes 10 ports, including the all-important 2x HDMI. The first display at 60Hz is added via HDMI and DP Alt-mode and the second at 4K 30Hz through HDMI and InstantView.
Also included are Gigabit Ethernet, MicroSD card reader (UHS-I), 3.5mm audio jack, 2x 5Gbps USB-A, and one 5Gbps USB-C. A further USB-C PD port allows you to charge the connected laptop at up to 100W—handy as the hub itself uses up one of your laptop’s Thunderbolt ports.
Hyperdrive Dual 4K HDMI Adapter – one 4K display at 60Hz, one 4K display at 30Hz
Pros
- Supports two external displays at 4K
- 100W passthrough laptop charging
- InstantView easier than DisplayLink
Cons
- Second 4K display is 30Hz rather than 60Hz
- Requires USB-C charger
- Connection: USB-C (5Gbps)
- Software: InstantView
- Max screens: 2
This double-function hub is designed to provide two HDMI display ports for a MacBook M1/M2/M3/Neo, plus passthrough charging for the laptop. It doesn’t offer a bunch of other ports like its big brother, the Hyperdrive Dual 4K HDMI 10-in-1 USB-C Hub reviewed above. As a result, it is cheaper and is one of the most cost-effective solutions for adding multiple monitors to the limited plain M1/M2/M3 Macs.
Like the 10-in-1, it uses SiliconMotion’s InstantView rather than DisplayLink software to get past the limitation.
The first display at 60Hz is added via HDMI and DP Alt-mode and the second at 4K 30Hz through HDMI and InstantView.
If you require more ports, such as Gigabit Ethernet, card readers and USB ports, consider the Hyperdrive 10-in-1 or one of the other hubs or docks reviewed here..
Ugreen Revodok Pro 209 9-in-1 4K HDMI Docking Station – two 4K displays at 60Hz
Pros
- Supports two external displays at 4K 60Hz
- 9 ports, inc. 10Gbps USB-C and USB-A
- 100W laptop charging
- DisplayLink file on dock connection
Cons
- Requires USB-C charger
- No card reader
- Connection: USB-C (10Gbps)
- Software: DisplayLink
- Max screens: 2
If you don’t need three external screens, we like this USB-C dock—the Revodok Pro 209 9-in-1 4K HDMI Universal Docking Station—for its two HDMI and two DisplayPorts, which you can choose between when adding two displays to your M1, M2, M3 or Neo MacBook. This should suit most monitors, unless you prefer direct USB-C displays.
Its spare USB ports (2x USB-A and 1x USB-C) are fast (10Gbps) for data transfer, and another USB-C port can be plugged into a USB-C charger (not included, which is common with the docks reviewed here) and supply up to 100W of charging power to the connected laptop.
There’s also a Gigabit Ethernet port for fast, stable wired Internet access.
You need to install DisplayLink on your Mac—instructions above—and Ugreen has made this easy by adding the download files to your Mac when you first connect the dock.
Read a full Ugreen 9-in-1 USB-C dock review.
Alogic DV4 Universal Quad Display Docking Station – one 4K display at 60Hz, two HD displays
Pros
- Supports three external displays, one at 4K 60Hz
- 14 ports, inc. 5Gbps USB-C and USB-A
- 3x HDMI 2.0 and 1x DisplayPort 1.4 video ports
- 12W USB-C charging
- 85W PD laptop charging
Cons
- 2 displays at HD, not 4K
- Requires USB-C charger
- Connection: USB-C (5Gbps)
- Software: DisplayLink
- Max screens: 2
With third-party DisplayLink drivers, this dock will support up to three displays on a Mac. You can connect one 4K at 60Hz display (3840×2160 pixels) via either the DisplayPort or one of the HDMI ports. The other two displays via HDMI, however, are at a lesser HD (1920×1080) resolution, both at 60Hz.
There is a link to the DisplayLink download printed in the user manual, although the type in the manual is the smallest we’ve ever seen!
The specs aren’t quite as impressive as the Satechi Triple 4K Display Docking Station, with 5Gbps a maximum data-transfer rate, although charging wattage for USB-A (3.0) is up to 7.5W each and USB-C is up to 12W, which beats the Satechi.
However, it does boast both SD and MicroSD card readers for affordable portable storage options, although UHS-I rather than super-fast UHS-II. And, crucially, it’s cheaper, although you will need to add your own USB-C 100W PD charger, unlike the Satechi Triple 4K Dock.
Satechi USB-C Multimedia M1 Adapter – one 4K display at 60Hz, one 4K display at 30Hz
Pros
- Supports two external displays at 4K
- 6 ports, inc. 5Gbps USB-C and 2x 5Gbps USB-A
Cons
- Second 4K display is 30Hz rather than 60Hz
- Requires USB-C charger
- No passthrough laptop charging
- No card reader
- Connection: USB-C (5Gbps)
- Software: InstantView
- Max screens: 2
The Satechi USB-C Multimedia M1 Adapter uses InstantView rather than DisplayLink but the installation process is practically the same when you follow the manual.
It includes 2x HDMI ports: one of which can support a 4K display at 60Hz and the other at 30Hz.
It’s more than a mere display adapter, though, as it also boasts USB-C PD passthrough charging at up to 85W, one 5Gbps USB-C port, and two 5Gbps USB-A ports.
Although named after the M1 processor, it will also work with similarly limited M2 and M3 MacBooks, plus the MacBook Neo.
Alogic Dual 4K Universal Compact Docking Station – two 4K displays at 60Hz
Pros
- Supports two external displays at 4K 60Hz
- 7 ports, inc. 10Gbps USB-C and USB-A
- HDMI and DisplayPort versions
- 78W laptop charging
Cons
- Requires USB-C charger
- Connection: USB-C (10Gbps)
- Software: DisplayLink
- Max screens: 2
The Alogic Dual 4K Universal Compact Docking Station comes in two models—the CH2, which features two HDMI 2.0 ports; and the CD2, with two DisplayPort ports—so you can choose which best suits the external displays you already own.
Two external screens are probably enough for most people. If you require three, see the other hubs and docks reviewed here. Both screens can be up to 4K at 60Hz. Basic instructions are given on installing the DisplayLink software for M1, M2, M3 and Neo Macs.
This neat, compact dock doesn’t feature as many ports as others mentioned here but what it has are top-rated: both the USB-A and USB-C ports support 10Gbps data transfer. There is also a Gigabit Ethernet port and a UHS-II SD card reader.
A passthrough USB-C port—you need to add a suitably powerful charger—can handle 100W, although 22W is required by the dock so leaving 78W for laptop and device charging. The dock must be connected to the laptop to allow device charging.
EZQuest Ultimate Plus USB-C Multimedia Hub – one 4K display at 60Hz, one 4K at 30Hz, one HD
Pros
- Supports three external displays (2x 4K; 1x HD)
- VGA if you need it
- 12 ports, inc 4x 5Gbps USB-A
- 85W laptop charging
Cons
- Requires USB-C charger
- Second 4K display is 30Hz rather than 60Hz
- Third display is HD not 4K
- Connection: USB-C (5Gbps)
- Software: DisplayLink
- Max screens: 3
The EZQuest Ultimate Plus USB-C Multimedia Hub has two HDMI ports and a VGA port, and supports one 4K at 60Hz and one 4K at 30Hz via HDMI and 1080p HD via VGA. If you want three 4K displays, look instead at the Ugreen Triple Display Dock.
It also features 5Gbps USB-A ports, Gigabit Ethernet and card readers.
Like the Ugreen dock, it requires a USB-C charger for power and can pass through up to 85W to the connected MacBook, but connects via slower 5Gbps USB-C.
StarTech.com USB-C Hybrid Triple Monitor Docking Station – DisplayLink dock with video options

Pros
- Supports three external displays at 4K 60Hz
- 15 ports, inc. 10Gbps USB-C and USB-A
- 85W passthrough laptop charging
Cons
- No card reader
- DisplayPort didn’t work on our test Mac
- Connection: USB-C (10Gbps)
- Software: DisplayLink
- Max screens: 3
This triple-monitor DisplayLink-based docking station is positively bristling with ports: 15 in total.
Most interesting to us here are the six video ports: 3x DisplayPort 1.4 and 3x HDMI 2.0. This doesn’t mean you can connect six displays but it does should give you flexible options for the type of connection that fit your displays. However, in testing we had no success linking via DisplayPort, which makes the extra options rather worthless. As such, we prefer the other docks and hubs reviewed above.
You need to download the DisplayLink drivers for your M1/M2/M3/Neo Mac. StarTech.com has a link and a video, or just follow our guide above.
As well as the half-dozen video ports are six USB ports: 2x USB-C (one at 10Gbps and one 5Gbps), plus 4x USB-A (one 10Gbps and three 5Gbps). The 5Gbps USB-C port can charge a connected device at 18W, enough to fast-charge an iPhone. One of the 5Gbps USB-A ports can charge at 7.5W.
Rounding off the many ports are Gigabit Ethernet and a 3.5mm Audio In-Out.
There’s no card reader to add portable storage but you could connect an adapter to one of the USB ports.
Baseus Nomos NU1 Spacemate Air – two 2.5K displays at 60Hz
Pros
- Supports three external displays at 4K 60Hz
- 12 ports, inc. 10Gbps USB-C
- 90W passthrough laptop charging
- 12 ports
- Compact and portable
- Built-in USB-C cable
Cons
- 2 displays at QHD, not 4K
- No power from USB ports
- Requires USB-C charger
- No card reader
- Connection: USB-C (10Gbps)
- Software: DisplayLink
- Max screens: 3
In some ways this “dock” is more of a high-powered portable hub. It connects to the laptop via its built-in braided USB-C 2.6ft cable that can carry data at 10Gbps and power at 90W to the MacBook when connected to a wall charger.
Most desk-bound docks are weighed down by an external power brick, but the Baseus Spacemate is nimbler and can even draw enough power from the laptop to operate with power coming in.
When connecting two monitors via the Spacemate the resolution is limited to QHD (2560×1440 pixels) that is also called 2.5K to distinguish it from 4K (3840×2160) which most dual-screen DisplayLink docks offer.
There are six USB ports: four USB-A but just two 10Gbps USB-C ports and none that can output any real power to the connected devices.
Read our full Baseus Nomos NU1 Spacemate Air 12-in-1 (Mac) Docking Station review
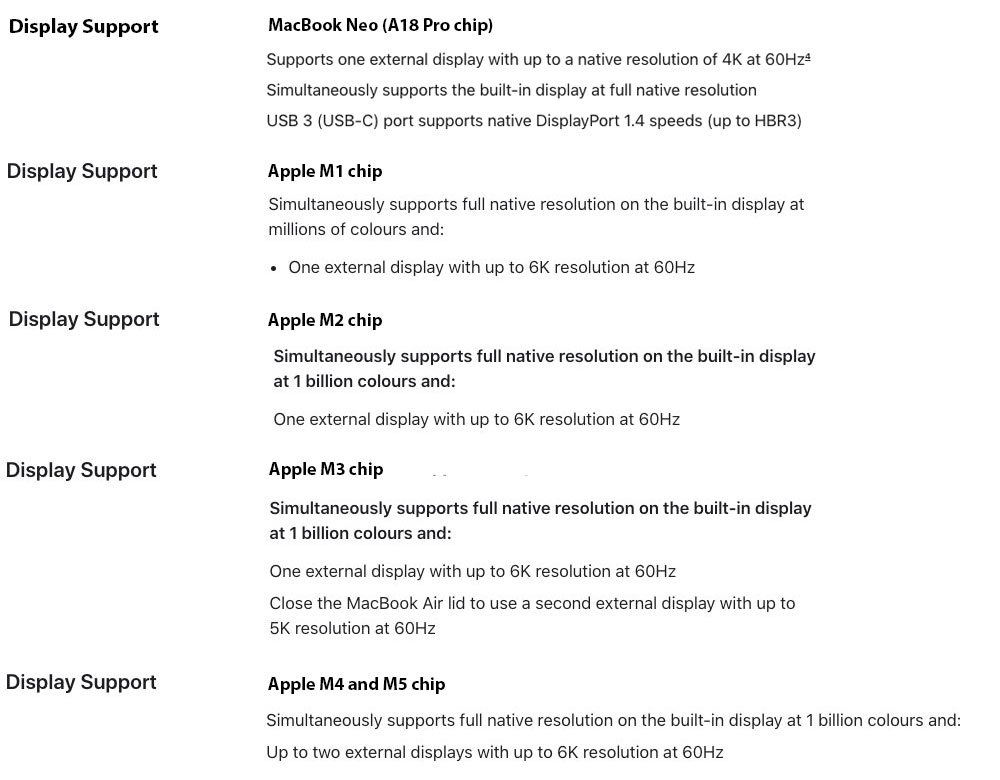
External display specs for Apple’s current laptops
Here are the external display specs for Apple’s current laptops, and what our workarounds can offer:
- M1 MacBook Air, M2 MacBook Air and M2 MacBook Pro: Maximum one external display—read our workarounds below for up to five displays.
- MacBook Neo: Maximum one external display—read our workarounds below for up to five displays.
- M3 MacBook Air, M3 MacBook Air and M3 MacBook Pro: Maximum two external displays if MacBook lid is closed. Four or more using our workarounds.
- M2 Pro MacBook Pro and M3 Pro MacBook Pro: Maximum two external displays. Four or more using our workarounds.
- M4 MacBook Air, M5 MacBook Air, M4 MacBook Pro, M4 Pro MacBook Pro and M5 MacBook Pro: Maximum two external displays. Three or more using our workarounds, or five using DisplayLink on certain docks.
- M2 Max MacBook Pro, M3 Max MacBook Pro and M4 Max MacBook Pro: Maximum four external displays. Five using DisplayLink on certain docks.
- M5 Pro MacBook: Maximum three external displays. Four or more using our workarounds.
- M5 Max MacBook: Maximum four external displays. Five using DisplayLink on certain docks.
Foundry
However, there are ways around these plain M1/M2/M3 and Neo limitations, allowing you to run two or more external displays off your MacBook, which we will outline here. In each case, there’s a software download and a docking station, hub or adapter required.
What you need to know about DisplayLink and InstantView
FAQ
Does DisplayLink and InstantView block Netflix or other streaming content?
DisplayLink and InstantView are great at adding multiple monitors to M1, M2, M3 and Neo Macs, but there is a catch.
Some protected content in Netflix, AppleTV, Amazon Prime, Disney+ or YouTube TV and other streaming applications may not play. The video remains black while audio keeps playing.
This is all down to how the macOS interfaces the DisplayLink driver used to access graphics content. As soon as one DisplayLink-enabled screen is connected, protected content becomes unavailable on all screens.
This is down to the streaming platforms using High-bandwidth Digital Content Protection (HDCP), which is Intel-developed digital copy protection (Digital Rights Management or DRM) that prevents copying of digital audio and video content as it travels across connections.
Because macOS requires DisplayLink and InstantView to enable Screen Recording, HDCP moves in because it thinks you are actually trying to record the content rather than just display it on screen.
How to enable streaming content when using DisplayLink or InstantView
To get round HDCP stopping your DisplayLink or InstantView setup showing Netflix, Amazon Prime and other streaming services, you may need to disconnect all the DisplayLink or InstantView screens, or switch to a browser other than Safari or Chrome (for example Opera or Firefox).
You can disable hardware acceleration in your browser to access the protected content.
On Google Chrome, go to Google Chrome settings, and click on “Advanced” and then select “System”. Here you can disable “Use hardware acceleration when available”.
Select “Relaunch” to activate the new setting.
If that doesn’t solve the black issue, disconnect the docking station, and try using the laptop’s build-in display or the direct video ports of the laptop.
Uninstalling the software is the ultimate solution.
Does DisplayLink/InstantView impact display performance?
DisplayLink may introduce noticeable latency in some situations or on certain monitors, so high-end studios and professionals should look to a native solution that doesn’t require third-party software.
Native video provides smoother, full-resolution lag-free video with higher refresh rates (4K at 240Hz), which makes it ideal for video editing and gaming. DisplayLink’s max is 60Hz—fine for most of us but nowhere near enough for video pros and gamers.
As well as leaning on the CPU more, DisplayLink can introduce noticeable lag with rapidly changing content such as fast-moving video or gaming. It also suffers from restrictions to DRM (Digital Rights Management) protected content as used by streamers such as Netflix and Apple TV that DisplayLink can, as noted above.